
New Baseboard Styles Join Stainless Toe Kick
Posted by StainlessToeKick.com on Feb 23rd 2022
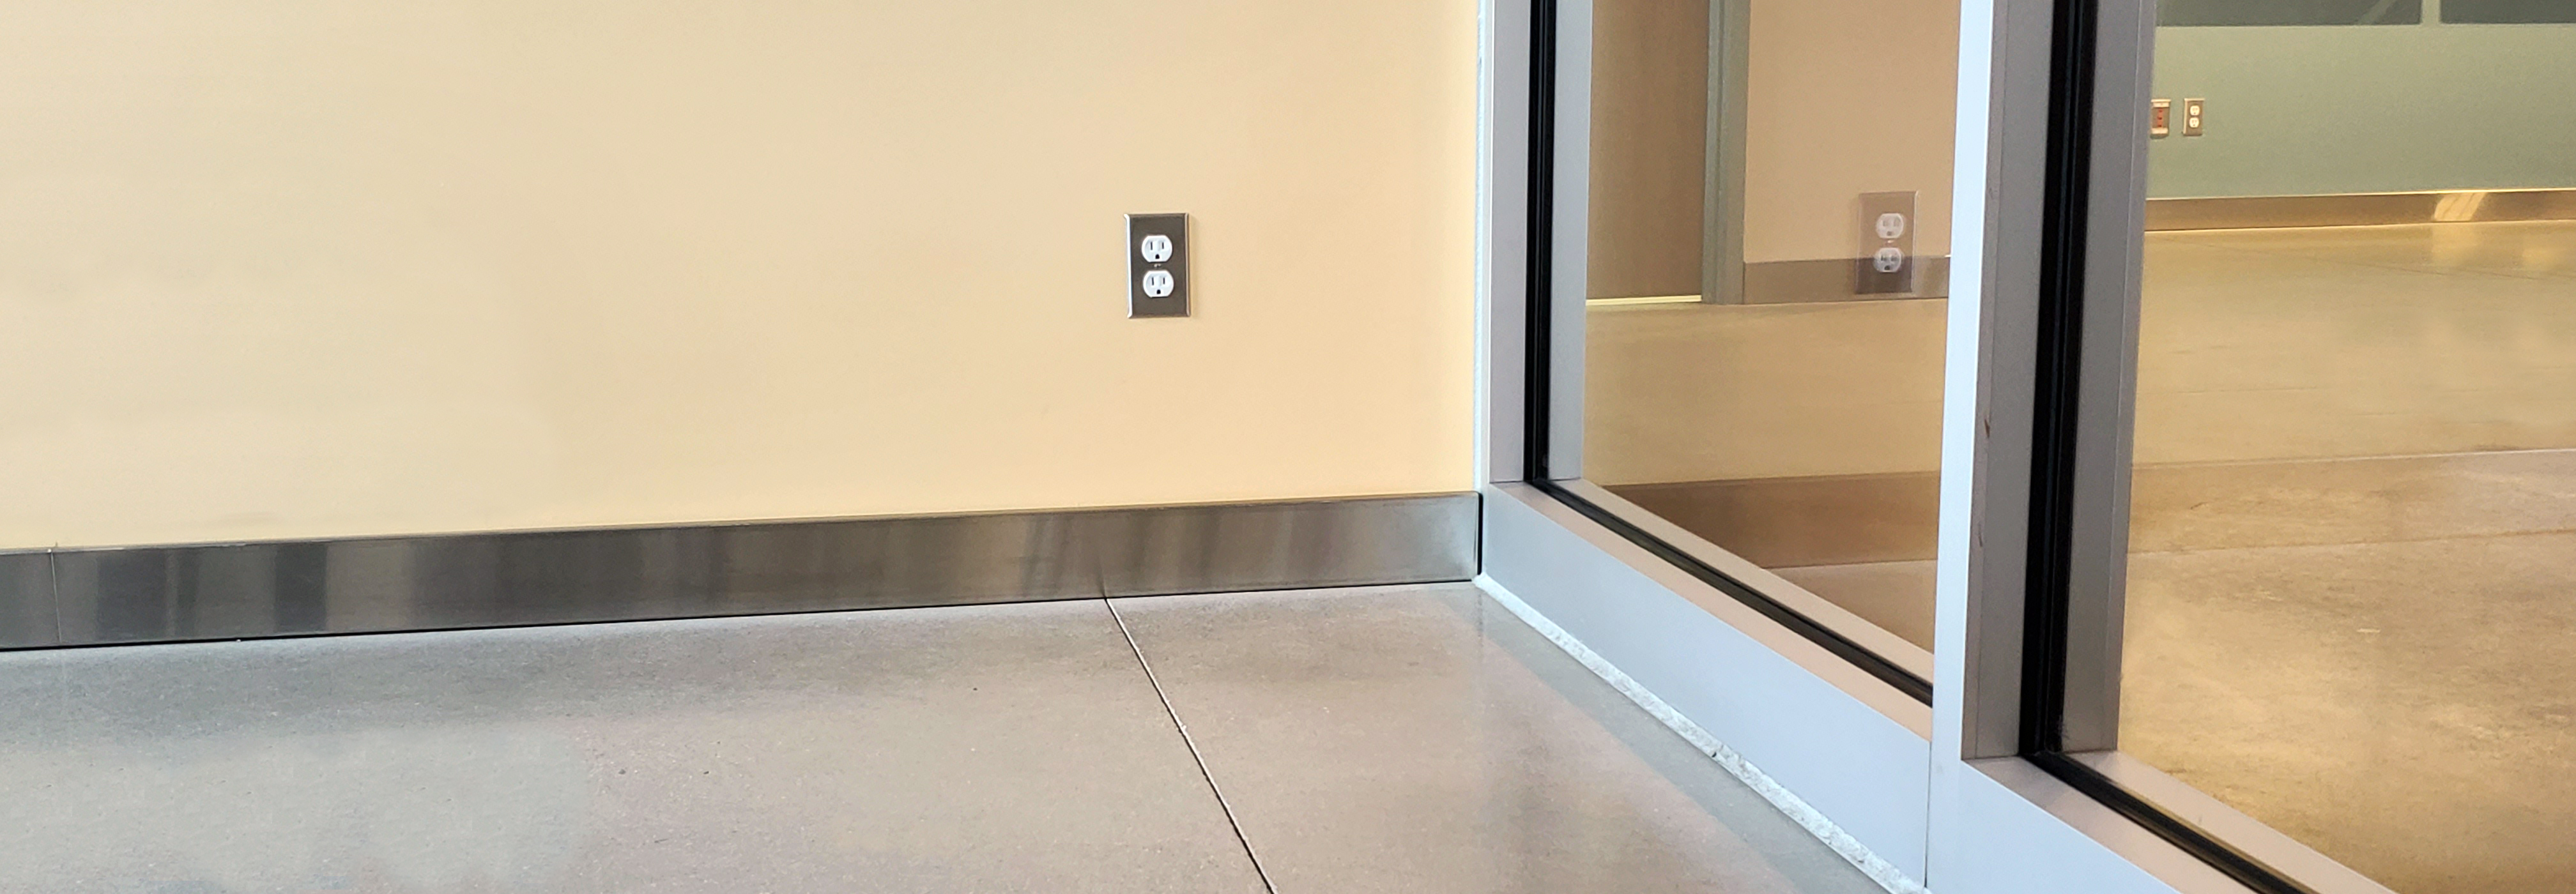
Here at Stainless Toe Kick, we think it’s always exciting when new products hit the shop floor, and in this case, goes all the way around it! Our new baseboard styles take our classic toe kick products and give dimension to them so they can stretch out past cabinetry all the way around the floor. We’ve been working hard on our two new styles of baseboard: traditional baseboard and cove baseboard, and have included some helpful tips for your next stainless baseboard project.
Traditional Baseboard
Our traditional baseboard has a rectangular profile and can come in up to 92” pieces, or you can use multiple pieces to cover any length room. It is available in 4 sizes: 3”, 4”, 5” and 6” in height. The 3” and 4” styles are .5” deep, and the 5” and 6” styles are .75” deep.
For this style of baseboard, we also have some options to customize the ends, seams, and corners of your room that may be helpful to compare:
Seams
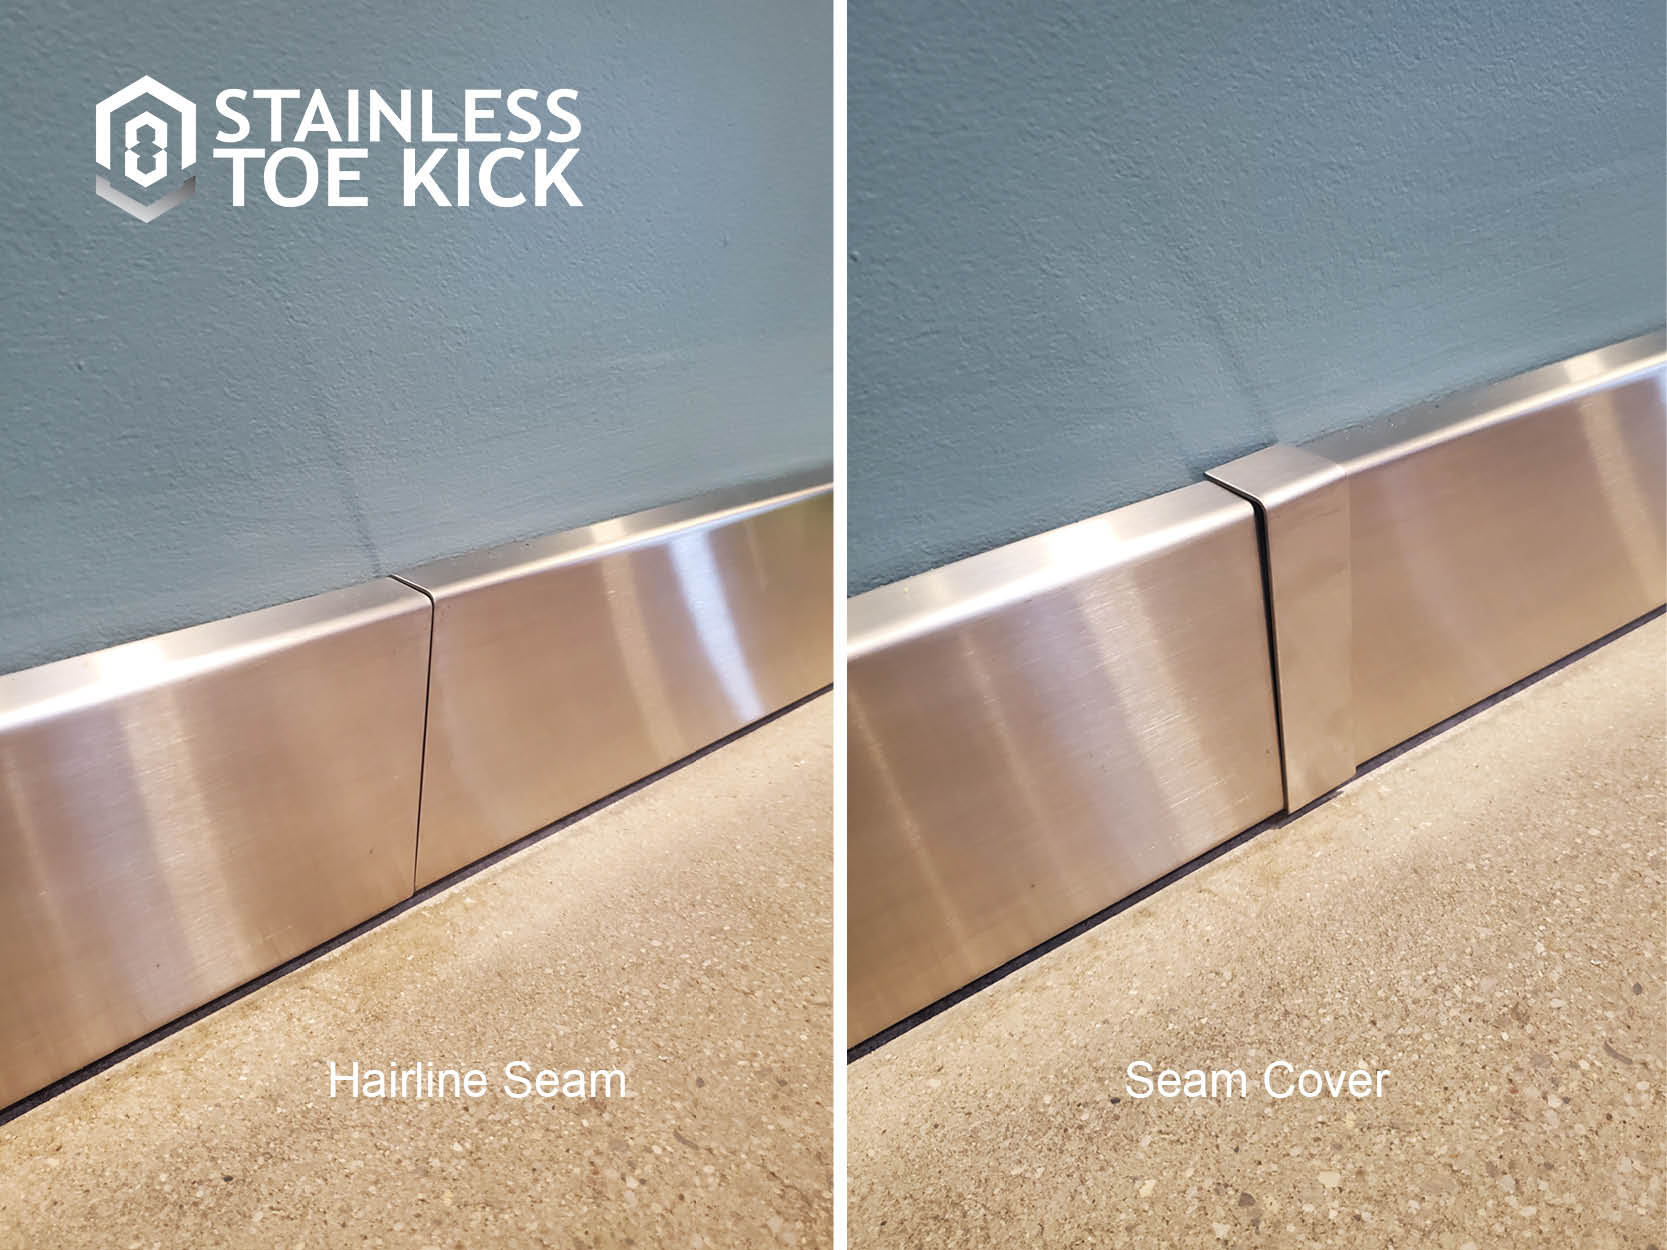
Option 1: Hairline Seams When using multiple pieces of baseboard, you can place them end-to-end, and the seam in between is called a hairline seam, as it will appear as a line on the baseboard. If you chose to use a hairline seam, take as detailed measurements as possible, preferably after your walls or cabinets are installed to have the most precise measurements possible to avoid any possible gap between the baseboard pieces. You can show the hairline seam, or you can cap the seam with a seam cover that attaches over the seam.
Option 2: Seam Covers Use a seam cover to add a professional cap around the gap between two pieces of baseboard. The seam cover has the added benefit that if your measurements are off by any distance, the “wiggle room” would not show as a gap in your baseboard, so this option makes installation easy and straight forward. This is the same as you would use caulk or wood filler in a wooden baseboard installation.
Inside Corners
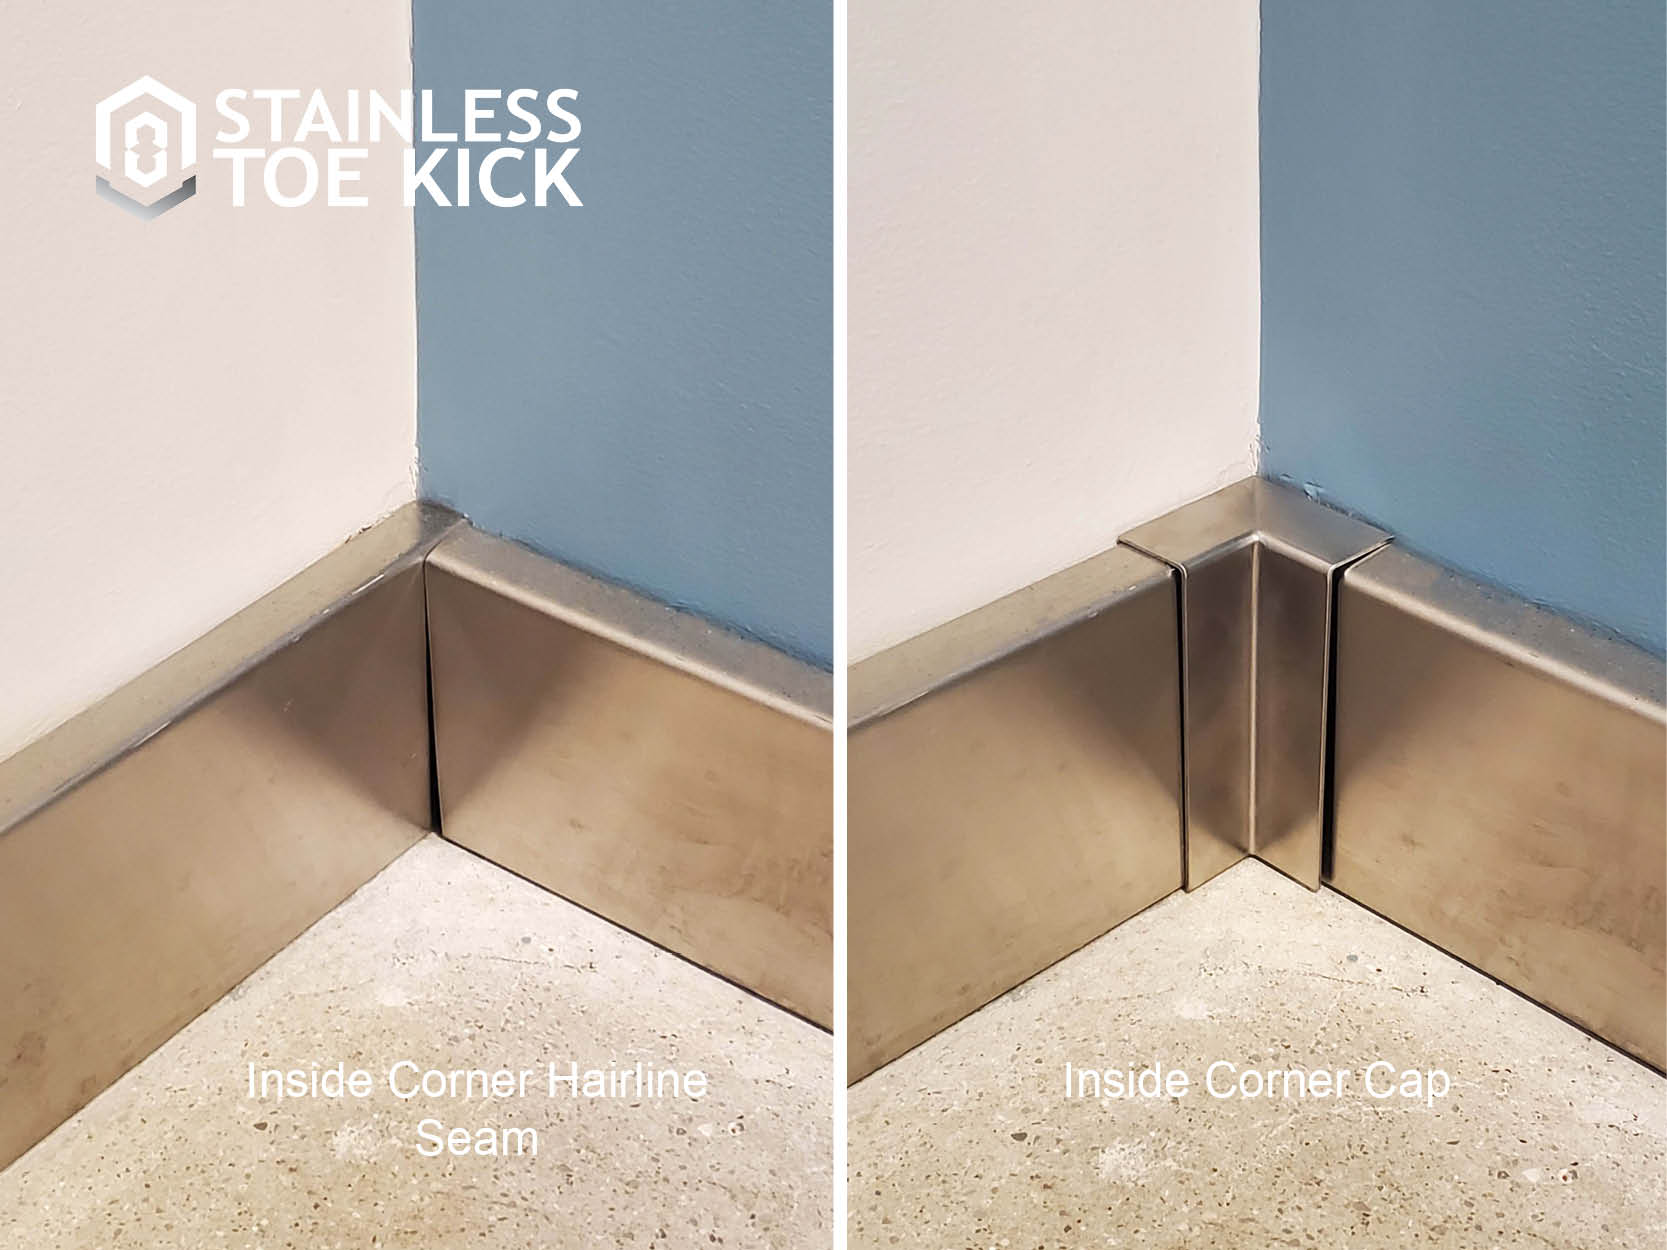
Option 1: Hairline Seam For an inside corner, you can use a hairline seam and place the baseboard pieces right next to each other. Just be very careful with your measurements that one piece is the depth of your baseboard shorter so that you don’t end up with baseboard that is too long for your space, as it is very difficult to cut once it leaves the shop, which is why we precision cut every piece to the exact length specified when ordered.
Option 2: Inside Corner Cap For easy installation, we recommend using a corner cap for inside corners of your baseboard. Not only does this simplify your measuring process, it covers the seam entirely and leaves a professional finish. This also allows the same extra space to adjust the size of your baseboards so that in case your measurements aren’t perfect, the baseboards can still end up with a perfect installation.
Outside Corners
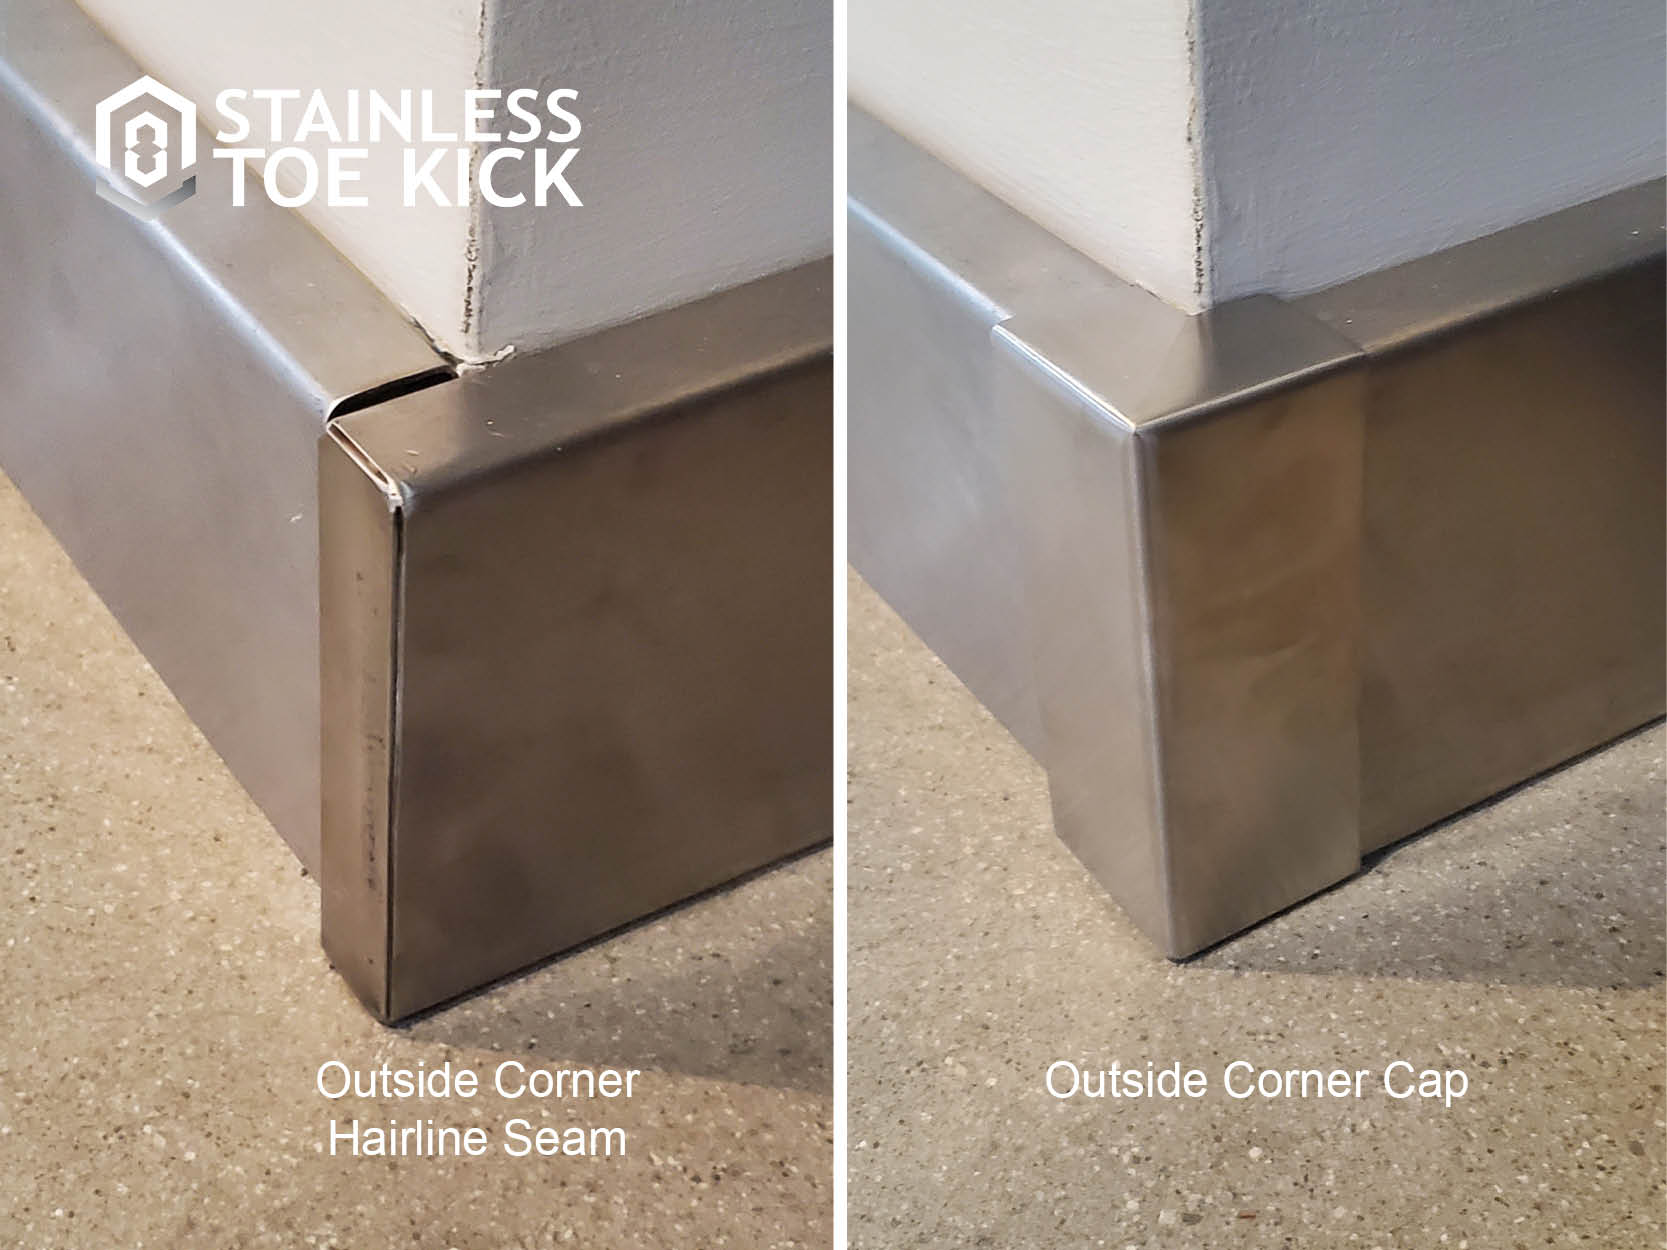
Option 1: Hairline Seam with 1 Welded End Cap The first option for an outside corner is to use a hairline seam. By doing so, one end face of the baseboard will be visible, so you need to plan carefully and select which piece of baseboard will get an end cap welded on. For this, select the welded end cap option (right or left side) in the baseboard purchase piece itself. Make sure to extend the size of one baseboard by the depth of the baseboard you are purchasing (.5” for 3 or 4” tall baseboard, or .75” for 5 or 6” tall baseboard).
Option 2: Outside Corner Cap This is the StainlessToeKick.com recommended installation style, as it simplifies the process of both measurement and end cap piece selection. Purchase the Outside corner cap separately and it will slide on over the full corner, capping both the end of the exposed baseboard profile as well as the hairline seam, leaving a professionally capped corner. It also makes installation easier since your measurements for the baseboard pieces can end anywhere within the cap making it easier to both measure and install your baseboard.
End Caps
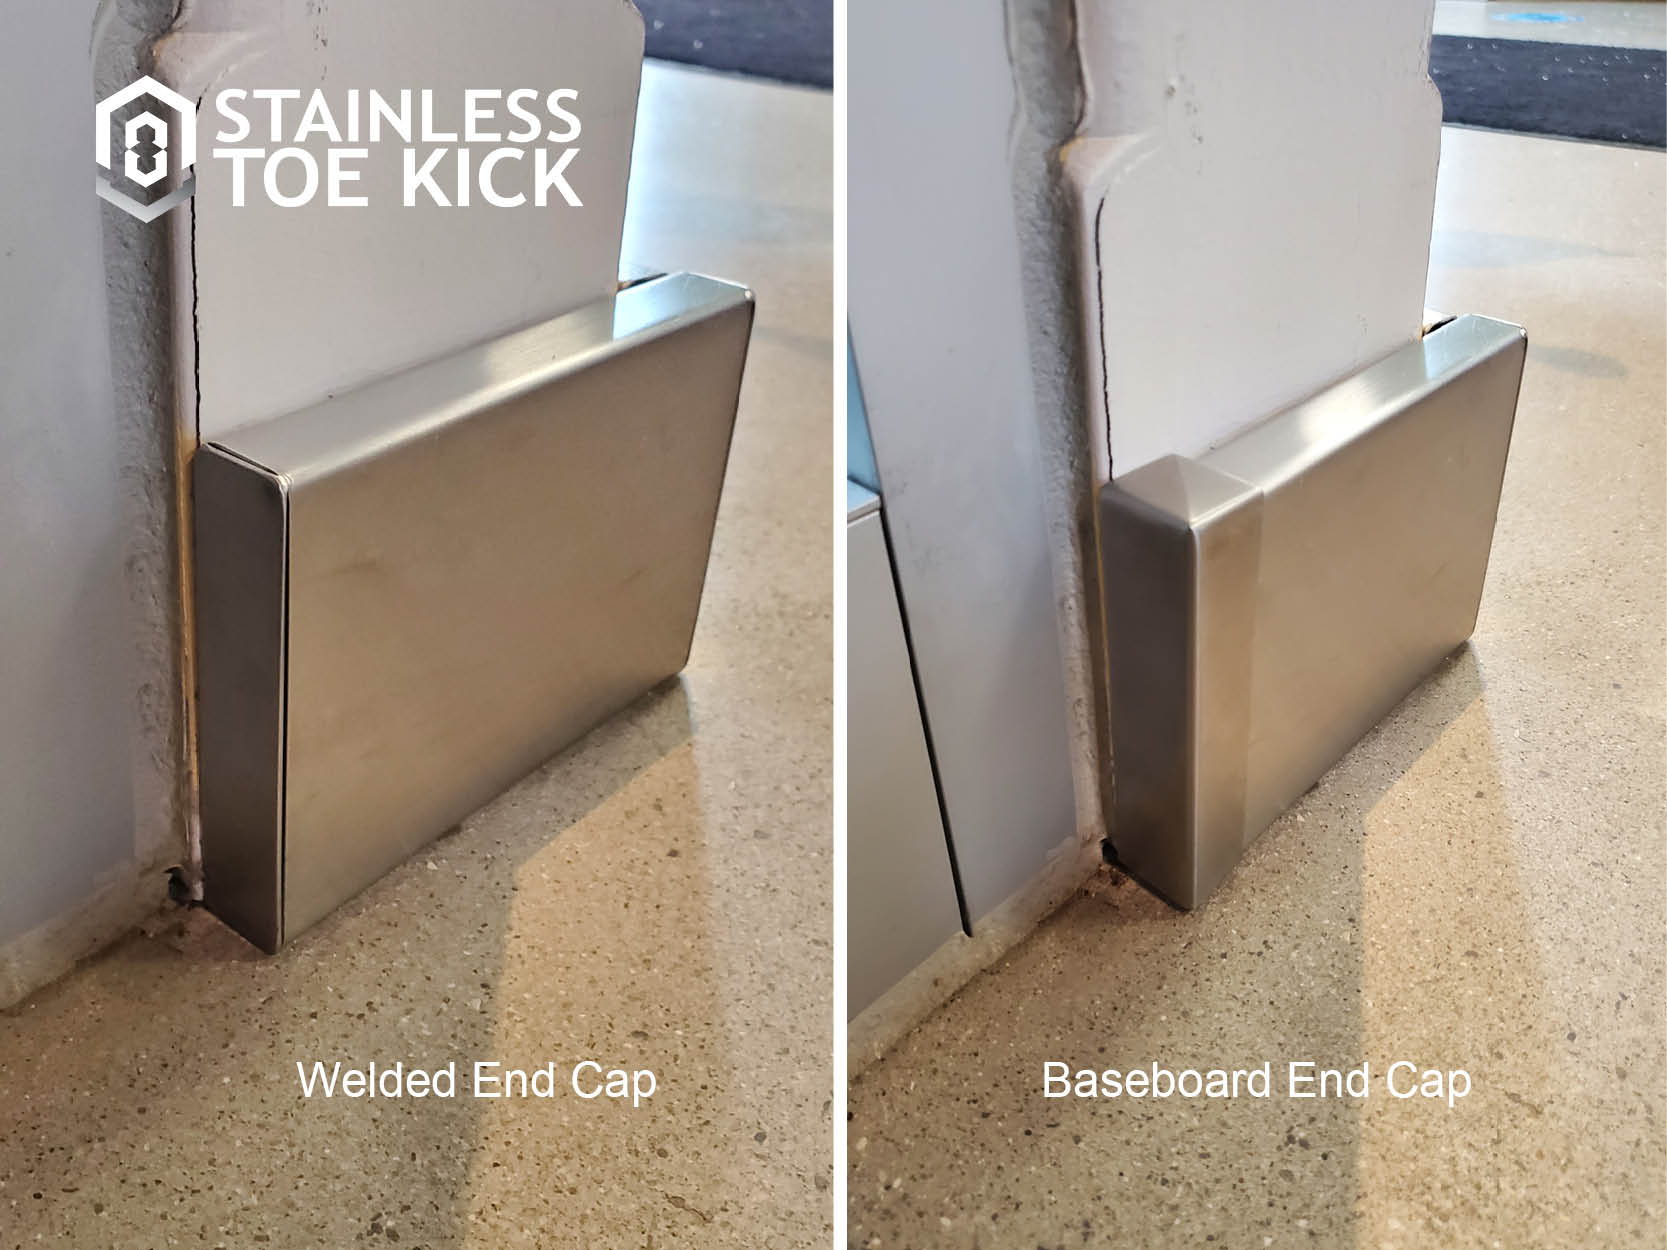
Option 1: Welded End Cap If your baseboard piece ends and the wall is not capped by other vertical trim, you may want to select a welded end cap so a profile view of the interior is not visible.
Option 2: Baseboard End Cap To coordinate with our other baseboard accessories, you can also select a separate end cap and install in the same manner as the Inside and Outside Corner Caps. The end cap will just slide over the end profile of the baseboard and give it the same polish as any other corners of your project.
Option 3: No End Cap If your baseboard terminates directly into a wall, trim for any window or door, or any other surface perpendicular to the direction of the baseboard, you do not need any end cap as the profile of the baseboard will end directly against another surface.
Cove Baseboard
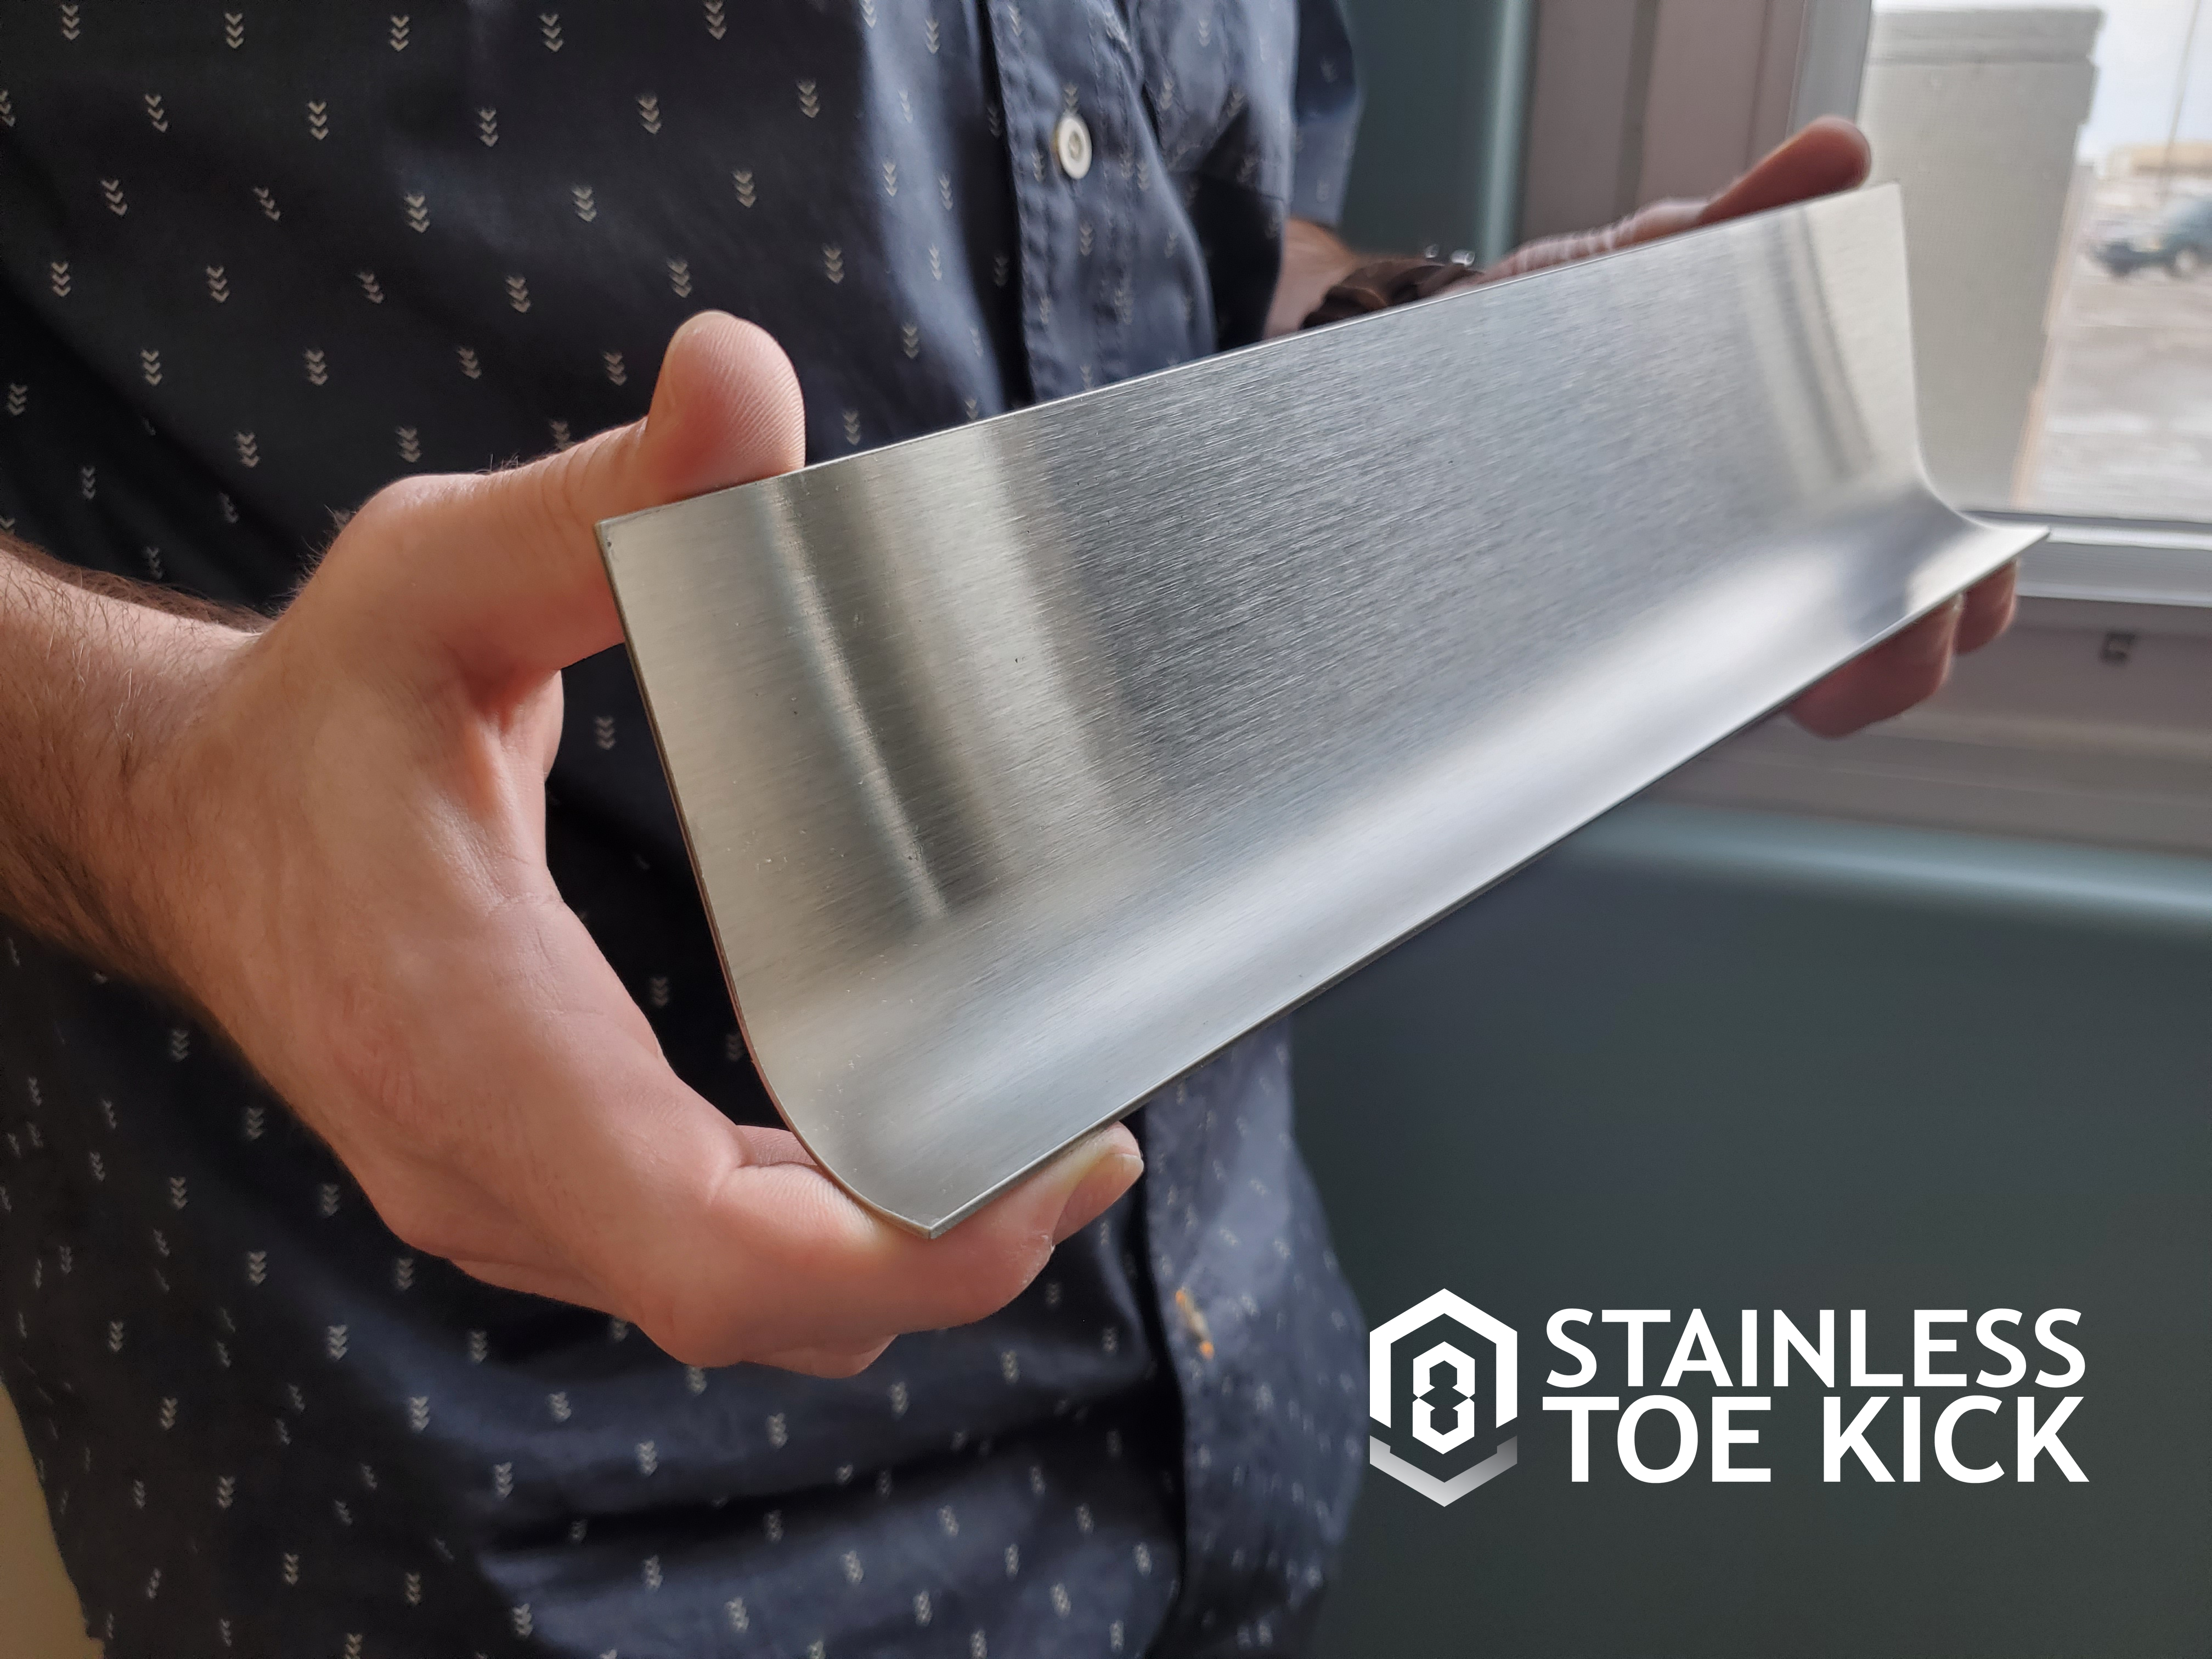
Cove Baseboard is our newest and may be our favorite style of baseboard yet. Inspired by the style of toe kick most common in food service and medical environments, the rounded edge on the bottom of Cove Baseboard brings both a modern curved design detail and packs a punch of functionality! The curve at the bottom makes it easier to clean by eliminating the sharp corner of the floor that catches dust and dirt, which is why areas that specialize in keeping things clean or clean frequently (like food service kitchens, hospitals, and laboratories!). But who doesn’t love things that make things easier to clean? We certainly do! The trickiest part of this baseboard is the corners, so we’ve developed some handy corner caps to solve the challenge of this shape of baseboard, and we are always innovating new solution as well.

Inside and Outside Corner Caps (sold separately) bring together two pieces of cove baseboard.